I've been busy. Months ago I decided that I would embark on a mostly DIY Christmas this year, and it would have been easier had I not had GOBS OF HOMEWORK TO DO. But now that my semester ended just over a week ago, things have slowed down quite a bit and I have had time to do things I want to do- craft.
Pinterest has been an amazing resource for finding gifts to make for my family at low costs, which is what I was looking to do. I got lost in much of the shuffle and hubub of being here and there, I completely forgot to save receipts and actually do what I wanted to do originally, which was record exactly how much (or little!) I managed to spend. Oh well. It ended up being more than I figured anyway, because we ended up getting my parents tablets and accessories.
ANYWAY! I even made homemade gifts for the children that I babysit and they LOVE THEM. I was not expecting the response from them that I got from them- they're only 3 and the other JUST turned 6, and they got SO excited over stuff I literally estimate I spent $7.00 TOTAL on, including wrapping, for them.
Look what I made!!
For the kids:
Multi-melted crayons
I love these, and I actually made myself one while I was making the rest of them. We moved YEARS ago, and by the time we got into the house from staying where we were, we (sibling and I) were a few years older and had next to no use for the things we had in storage. Two months ago (about 10 years after we moved) we unboxed some things and I found a next-to-brand-new box of Crayola crayons. So basically, these crayons were free for me. I peeled them, broke them into pieces, and put them into a cupcake pan mostly according to color family, and a few I put together that included all colors just to make super multi-colored ones. And I baked them at about 250 degrees for maybe a half an hour, or until I could see the very center of the piles of crayons totally melted. Then I took them out, let them cool just a bit and then I threw them into the freezer until they hardened. Pop them out & BAM! Pretty!
Animal Masks
I found these being sold on Etsy, for more than I would have paid for them and they were sold out anyway. So I figured I would make some of my own! Basically all it took was some notebook paper that I made my own template out of (fold in half and draw half the "pattern" so each side is the same size). Double the sheet of felt (I got mine at Michael's), pin the template & cut. Any additions to the front of each mask, I only sewed onto the TOP of the two layers. Sew stretchy strap in between the 2 layers.
Hot rice bag
This is mine.
I forgot to take a picture of the ones I made for them, but I actually ended up making 6 of these, two of which went to THEIR parents and two of which went to Bear's parents. I basically just made a 5 1/4 x 5 1/4 inch square rice bag out of my fabric that lined with flannel so the hot rice wont burn hands. Sew all the way around, leaving about 1.5-2 inches to flip inside out and fill with rice. Clip corners, flip inside out, use scissors to push out corners, blah blah blah. I filled mine around 1/2 to 3/4 of the way full with rice using a funnel, use a ladder stitch to close the hole. Microwave for about 30 seconds to 45 seconds depending on how warm you want it, and enjoy :)
For THEIR parents, and for the future in-laws
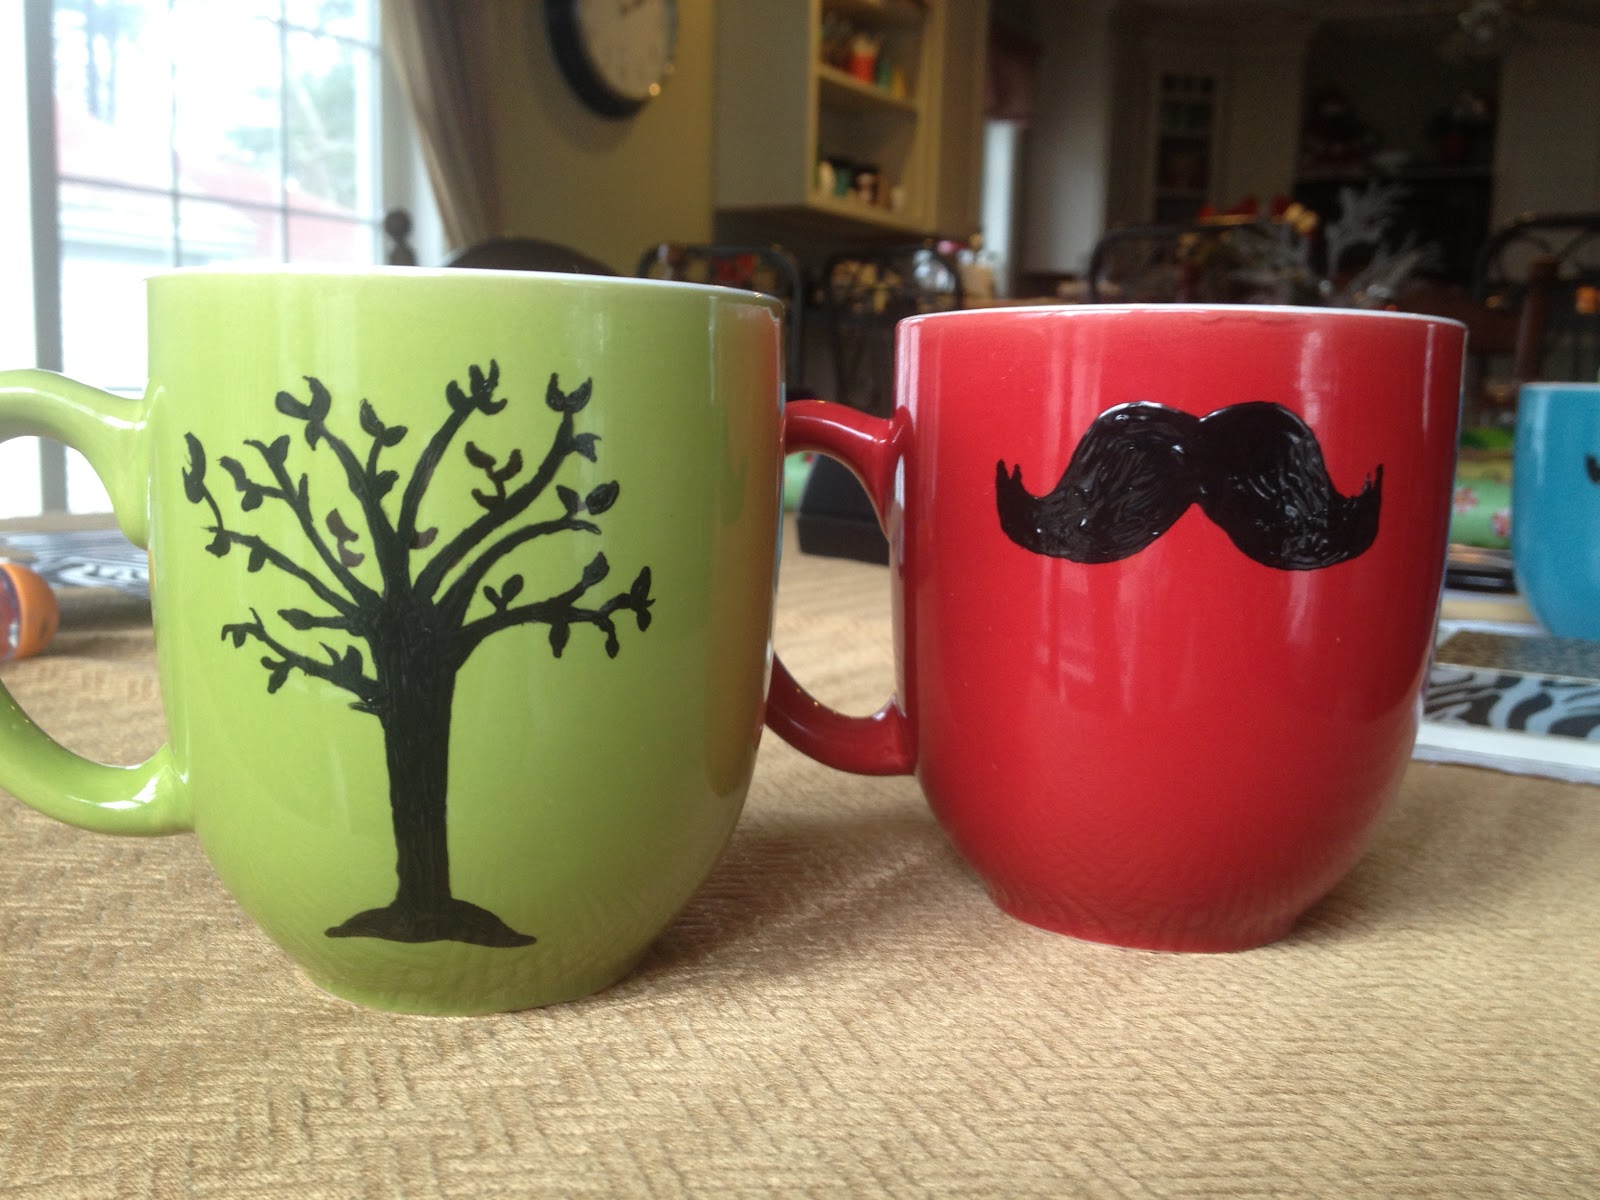
Baked design mugs
I LOVE these mugs. I did print out silhouette pictures of what I put on the mugs, but honestly I ended up free-handing a lot of it. I used a black Sharpie at first, and then decided I didn't want the shiny, inky, oily look of the ink so I went over it with a glass paint by Martha Stewart that I currently cannot find right now...but you put it on cups and mugs and plates and whatever and BAKE it, at 350 degrees for a half hour. And it comes out like that! So cute. Those were plain mugs from Target.
For ONE of my future sister-in-laws
Reversible bag
This was actually really interesting for me to make, because I literally don't think I have ever, ever made a bag before, let alone a reversible one. I found
this post from Pinterest which provides a printable pattern, and tried it for myself. The only thing I didn't do was dart my corners but I loved it just the same. And my recipient LOVES it- the colors are
just her thing. So cute! I may end up making one for myself, too.
I also made this same person button earrings, that I also forgot to take a picture of. I just got earring things with backings from Michael's and hot glued small matching buttons to them and let them cool. Voila! I ALSO made her one of these, except in pastel blue with white polka dots, but this next one and the ones after are for my BFF:
Fleece ear warmer
I made one of these for myself, too. So cozy!
Found here, except I cut 2 instead of just 1.
Bracelets
Found basic instructions
here and
here :) ...I hope these fit. Her wrists are teeny tiny so I just hope I didn't make them TOO tiny.
DIY coasters
These are EASY and WICKED CHEAP. I literally purchased these 4 plain white tiles from Lowes for 16 cents a piece, and got scrapbook paper from Michael's. I sponged Mod Podge on the back of the paper, laid it on the glossy side of the tile, made sure it was straight and put them upside down to dry with the weight of its own tile keeping everything together. When it
dries completely, Mod Podge all over the top of the paper, I usually do 2 layers of this, but wait for each application to also dry completely, or else you will pull the color on the paper and it'll bleed and possibly rip the now wet paper and it'll get ugly. When EVERYTHING dries, I went over everything with a clear gloss finish spray paint. When that dries, I Mod Podged a square of scrap felt to the bottom so they don't scratch. Done.
For Bear's Sister
Bow tie necklace

This was also wicked easy. I purchased a rose gold colored chain from Michael's as well as some hooks in the same tone. Measure around your neck a good chain length, and take off about 2-2.5 inches. This length will be added when we sew in the bow. I think I took a scrap of fabric about 4 inches wide and maybe...9 inches long? I don't remember. Fold in half lengthwise, sew at about a 1/4 in seam allowance. I literally didn't even bother pressing my seams, I'm super lazy. Flip inside out, fold ends to meet right in the middle of the back, and stitch them there. I hand stitched everything else. Scrunch the bow right in the middle, and stitch straight down to keep it scrunched. Take a tiny scrap of the same fabric, make a tube with it the same way you did for the bow itself, and use it to wrap and hand stitch right around the middle. Lastly, find the very center of where the necklace falls, and break that part of the chain so it comes off (use jewelry pliers for this.) Hand stitch the chain rings BEHIND the bow, and you're finished! I might have to make myself one of these, too.
For my mama,
Little hand bound notebooks
Instructions found
here. My mama just likes notebooks and places to write things. She's quite the DIYer also so I wanted to find something she HASN'T made yet and doesn't INTEND to make.
And LASTLY, for the Bear.
Mustache pillow cases
I used pillow cases and a yard of dark gray flannel. On the wrong side of the fleece (keep it folded, so both sides are the same) I literally just eyeballed and hand drew half a mustache, cut it out. I zigzag stitched them onto the pillow cases, with the "tips" of the mustache pointing at the opening of each pillow case. Again, I would love some of these for me. I love flannel pillow cases!
I'm so sorry this post is like 17 years long- I might break it up into separate posts...later. Between watching TV this morning, eating pie for breakfast, and writing this, I've been sitting here for like 3 hours. I'm gonna go play with the NEW SEWING MACHINE I GOT FOR CHRISTMAS!!!!!